If you’re anything like me then you probably love to tinker with Linux things right? Spin up a server, configure it to do something cool, maybe host something at your home for your family to use. It’s an expansive world of topics that’s as deep or as shallow as you care to delve! At least that’s how I think about Home Labbing.
The only real problem is that it can be an awfully expensive hobby to get into. You need a server right? One of those massive noisy jet engine machines with Xeon CPUs and fist fulls of ram, and discs on discs on discs! And you need to fill up an entire server rack with those boxes to really do it right, right? What if we just didn’t? It’s awfully expensive to purchase all that gear, and the power bill is unfathomably painful. Plus when was the last time you got a 1u server through airport security? “Oh yes Mr. TSA Agent, this Dell R620 is my carry on.”, nobody is allowing that, ever.
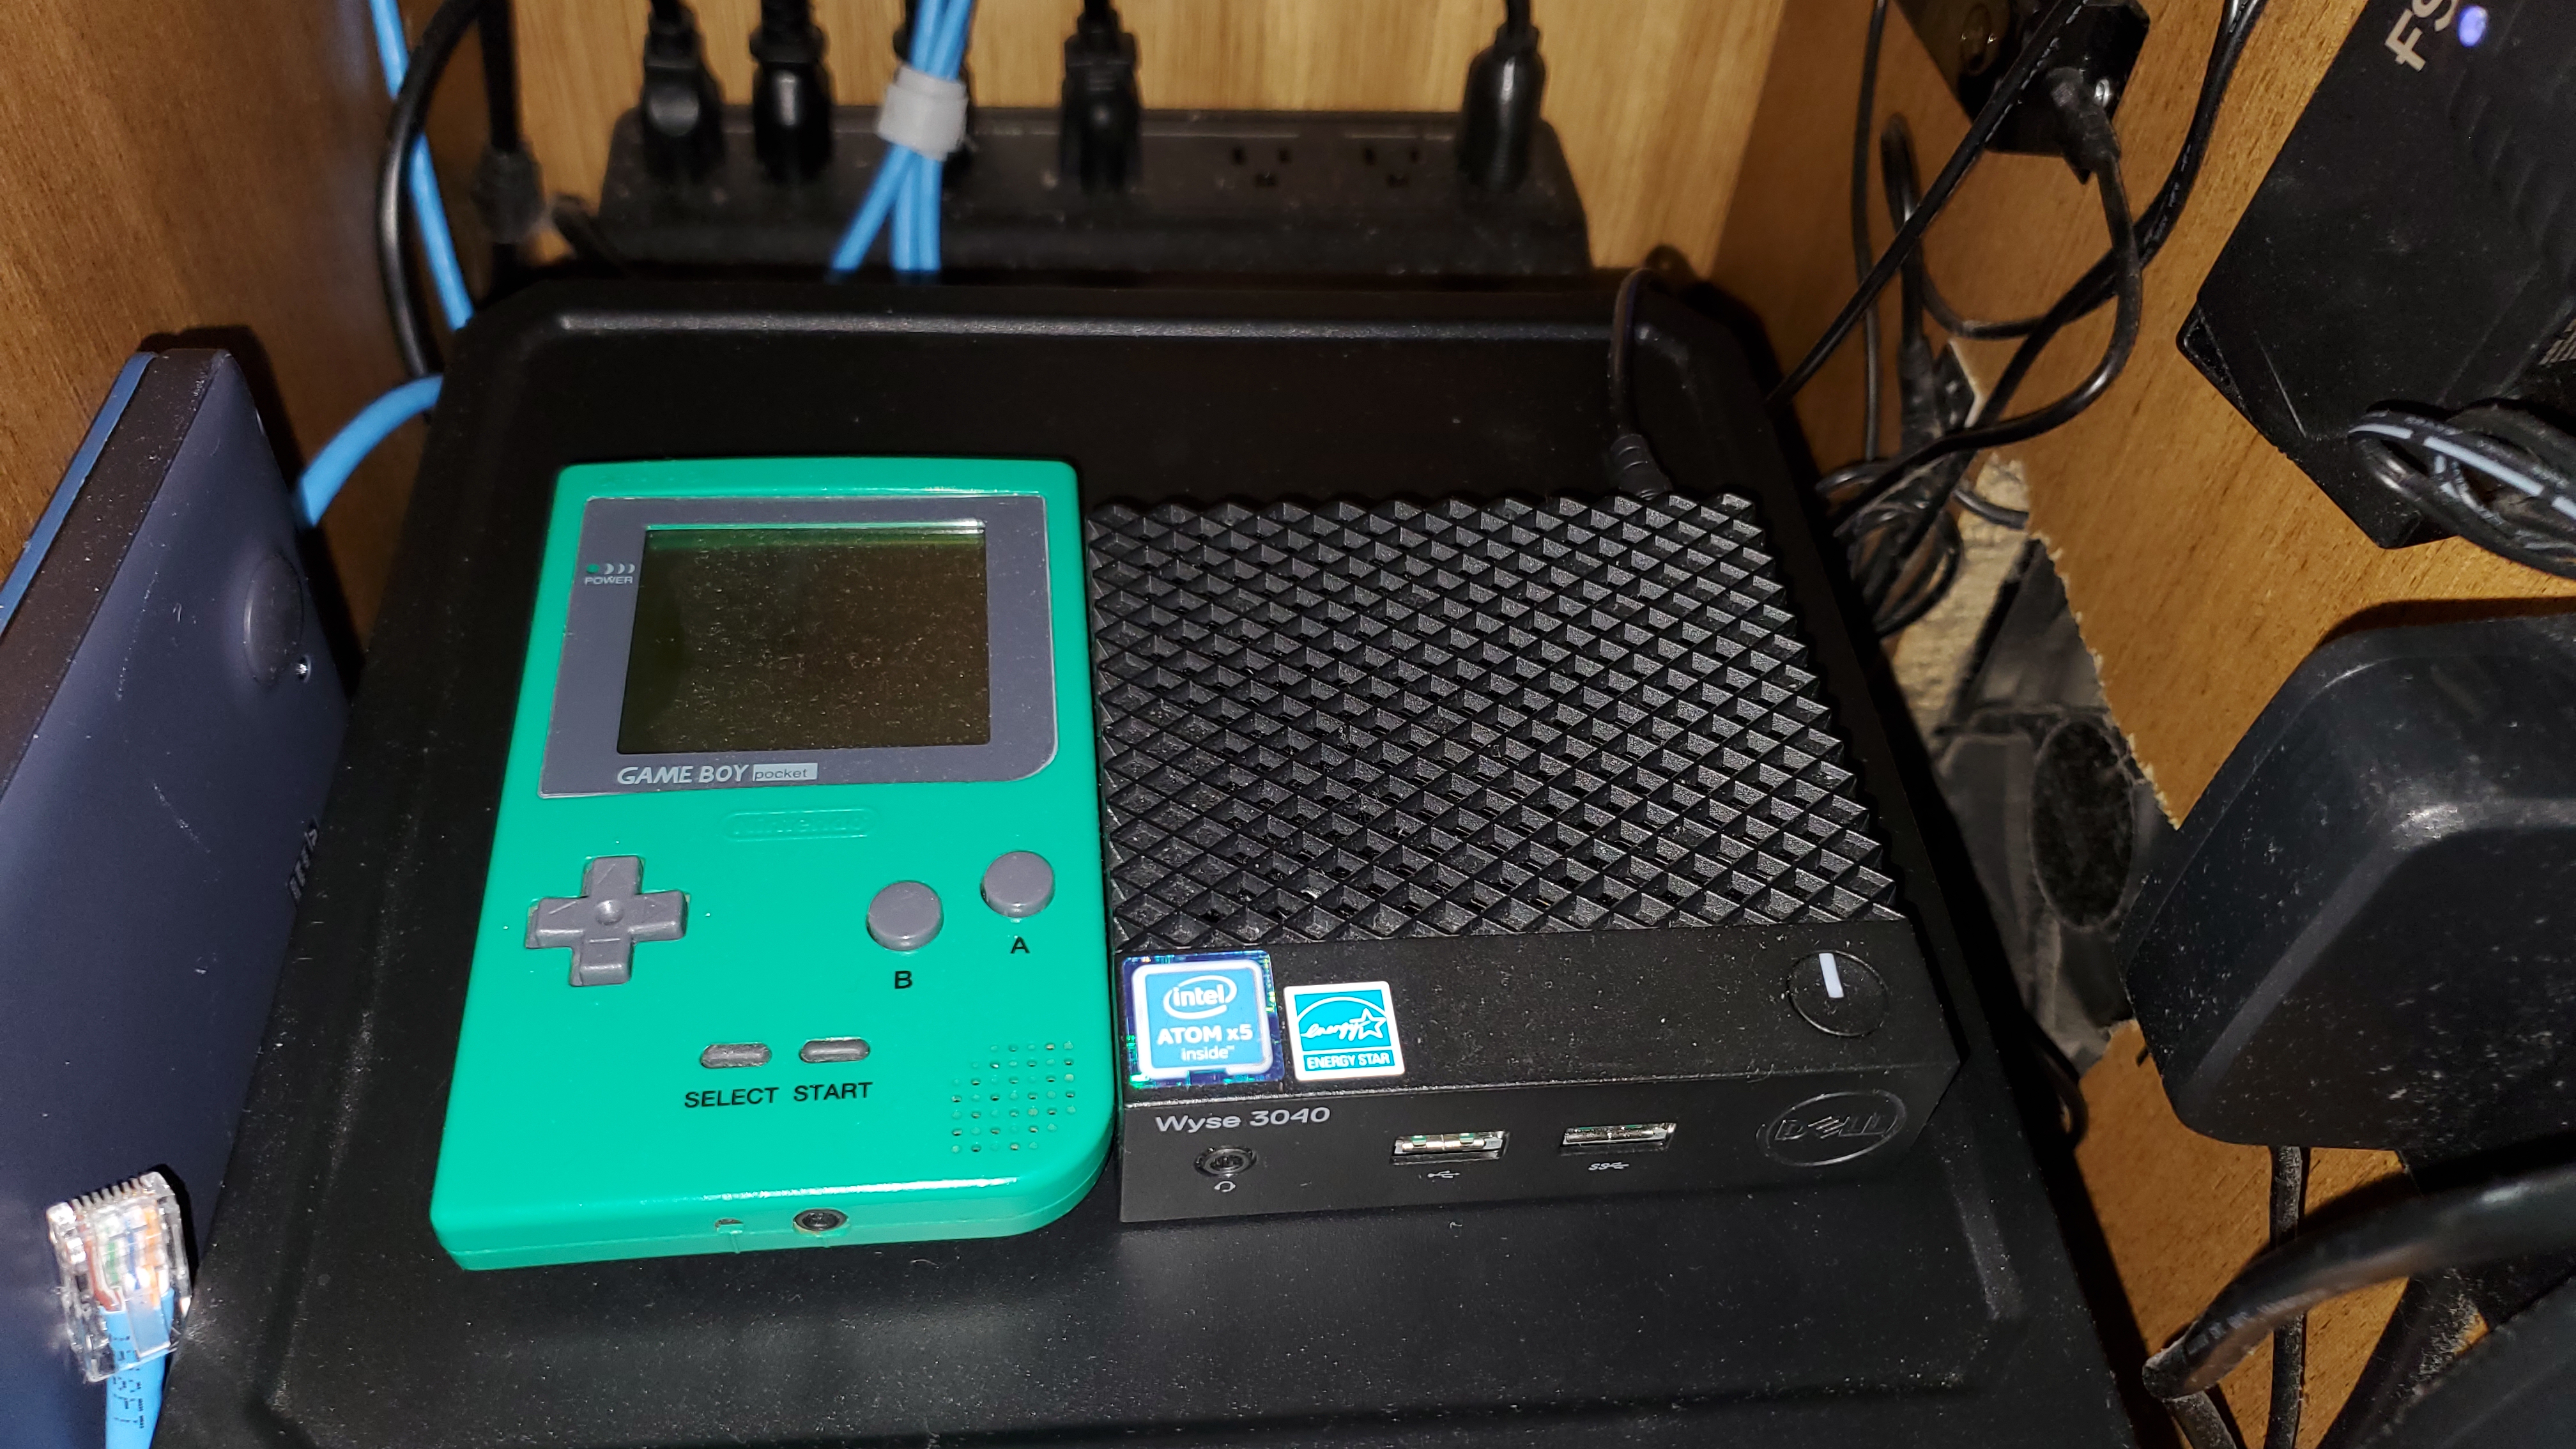
That’s why I’ve built a tiny, affordable, & portable homelab on a Dell Wyze 3040!
That’s right, that tiny box is a homelab! Spec wise it’s not particularly impressive, but inclusive of all the little add on parts it’s more affordable than a raspberry pi, and has an x86_64 cpu so it ends up being very easy to work with.
The quad core Atom cpu is capable enough to run a light weight headless Linux OS like Alpine, you’re just somewhat limited due to the itty bitty amount of ram it has. You also get a full gigabit NIC, and a few USB ports, so it ends up being easy to throw in an external hard drive, or a USB adapter to make up for what it lacks. I use mine as an LXD node (we’ll talk a little more about that further down), so I included the cost of an external USB for those containers in my costs, and since I travel there’s also a wireless USB adapter too.
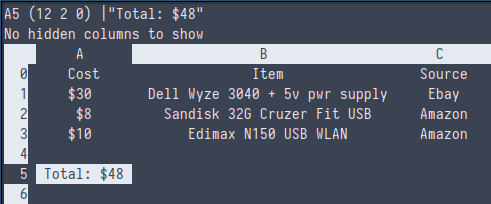
I managed to get a really good deal on Ebay for my Wyze, but if you can find one on the lower side you probably only need to worry about purchasing a 5v power supply for it, which can be gotten off of Newegg for about $10. Everything else is just odds and ends you probably already have. And honestly the only piece you truly need is some USB compatible storage to make up for the woefully small EMMC that the system comes with.
Right, enough about that, lets talk about that LXD setup. If you’re not familiar with what LXD is, I highly suggest you take a quick jaunt over to Canonical’s website where they have a bunch of detailed documents about it. Since this is a zine and it makes no sense to hyperlink that here I’ll just explain it in brief. LXD is an orchestration tool built on top of the LXC container technology. LXC lets you spin up itty bitty Linux containers that share the hosts kernel, but are isolated from the rest of the system. Using this you spin up little Linux systems, configure them however you want, and then destroy them when you’re done, or keep them around for hosting. That’s kind of the ethos of homelabbing in my mind, you try something hands on, if you mess it up you throw it away and start over. What you do when it succeeds is kind of a personal choice. Perhaps you leave whatever you built running, or document the process for a personal/public wiki, or you could be like me and automate every little experiment with Ansible or something. The world is your oyster! And that oyster fits inside of your carry on!
Here’s a little script I wrote to setup LXD on an Alpine system. It’s just a base, but it’s good enough to go from the initial installation directly to using LXD.
#!/bin/ash
#Setup clusterable lxd on alpine linux
ymdhms=$(date +%Y-%m-%d_%H:%M:%S)

install_apks() {
    printf "Install apks..\n"
    apk update
    apk add linux-lts-dev lxd-feature lxc lxc-lvm lxcfs bridge \
        lxc-templates lxc-download xz gnupg rsync debootstrap \
        grep zfs zfs-lts zfs-scripts zfs-libs zfs-udev eudev \
        eudev-hwids hwdata dbus shadow util-linux util-linux-misc \
        coreutils iproute2 findutils usbutils pciutils sysfsutils \
        gawk procps grep binutils wget curl syslog-ng acpid awall \
        haveged logrotate qemu qemu-img qemu-tools qemu-system-x86_64 \
        qemu-ui-spice-core qemu-chardev-spice qemu-audio-spice \
        qemu-ui-spice-app qemu-hw-usb-host qemu-hw-usb-redirect \
        qemu-hw-display-virtio-gpu qemu-hw-display-virtio-vga libvirt \
        ovmf swtpm distrobuilder distrobuilder-lxd make go git zram-init \
        iptables ip6tables aufs-util e2fsprogs fennel lshw lua5.3-libs \
        mosh openssl sudo tmux
}

setup_lxc() {
    printf "overlay\nip_tablesexifuse\n" | tee -a /etc/modules
    modprobe overlay ip_tables fuse

    if [ -f /etc/lxc/default.conf ]; then
        printf "Previous lxc config moved to /etc/lxc/default.conf.bak-$ymdhms\n"
        mv /etc/lxc/default.conf /etc/lxc/default.conf.bak-$ymdhms
    fi

    if [ -f /etc/conf.d/lxc ]; then
        printf "Previous lxc generic configuration moved to /etc/conf.d/lxc.bak-$ymdhms\n"
        mv /etc/conf.d/lxc /etc/conf.d/lxc.bak-$ymdhms
    fi

    #This allows for unprivileged docker container execution in the lxc containers
    printf "lxc.idmap = u 0 1000000 65536
lxc.idmap = g 0 1000000 65536
lxc.cgroup.devices.allow = a
lxc.mount.auto = sys
lxc.cap.drop =
security.nesting = true\n" > /etc/lxc/default.conf

    printf '# Configuration for /etc/init.d/lxc[.*]

# Enable cgroup for systemd-based containers.
systemd_container=yes

# autostart groups (comma separated)
#lxc_group="onboot"

# Directory for container logs (used for symlinked runscripts lxc.*).
logdir="/var/log/lxc"' > /etc/conf.d/lxc
}

unprivilege() {
    if [ -d /etc/subuid ]; then
        touch /etc/subuid
    fi

    if [ -d /etc/subgid ]; then
        touch /etc/subgid
    fi

    sugid="root:1000000:65536"

    if grep -q $sugid /etc/subuid; then
        printf "subuid exists, skipping...\n"
    else
        printf "$sugid\n" | tee -a /etc/subuid
    fi

    if grep -q $sugid /etc/subgid; then
        printf "subgid eists, skipping...\n"
    else
        printf "$sugid\n" | tee -a /etc/subgid
    fi

    #Enable cgfs in pam
    printf "session optional pam_cgfs.so -c freezer,memory,name=systemd,unified\n" | tee -a /etc/pam.d/system-login
}

set_services() {
    for service in cgroups lxd lxc lxcfs dbus zram-init; do
        rc-update add $service default
    done

    for service in dbus cgroups lxd lxcfs; do
        rc-service $service start
    done
}

examples() {
    printf "
==================================================
Getting Started:
lxd init

Launch a container:
lxc launch images:alpine/edge containername

Restrict Memory, CPU, etc:
lxc set containername limits.memory 100MB
lxc set containername limits.cpu 1
lxc config device override containername size=2GB

Jump into a container:
lxc exec containername /bin/ash

Move files between host & container:
lxc file push /path/on/host containername/path/in/container
lxc file pull containername/path/in/container /path/on/host

Nestable containers:
-> On the lxc host
lxc config set containername security.nesting=1
-> Inside the container
apk add fuse-overlayfs
printf '{ \"storage-driver\": \"fuse-overlayfs\"}' > /etc/docker/daemon.json
for service in cgroups cgroup-patch docker do;
    rc-update add $service default
done

Privileged containers:
lxc config set containername security.privileged=1
==================================================\n"
}

install_apks
unprivilege
setup_lxc
set_services
examples
Really the only thing left for you to do to take one of these nifty
little boxes and get yourself an itty bitty container lab, is to run
through the LXD init process. It’s fairly self explanatory, but make
sure that you pass it the full name of your USB thumb drive when your
setup your ZFS pool. To do that all you need to do is run fdisk -l,
find the USB device in the output, and then pass the /dev/sdx name
to the lxd pool argument. Everything else you can setup as defaults!
Have fun tinkering townies!