A New Yorker's dream of stashing a sailboat in his apartment. (And sailing it, too, obviously!)
A note about the name. Part of the idea was to have a boat that wouldn't only fit in my apartment, but also one that I could transport on the subway at need. Something that would fit through the doors and gates of the New York Subway trains. If I couldn't find a place nearby to launch, I could take a train somewhere uptown or even upstate! During off-hours, of course. Wouldn't want to try that in rush-hour!
So I love to sail. Haven't done it in ages, though. It can be somewhat tricky to plan when you don't actually own a boat. Or a car to get out to one. And you live in New York City where boat rental is expensive and difficult. And you don't live on a boat. Anyway, I haven't sailed in a few years.
Then I found out about nesting dinghies. These are little boats, usually with rowing and motoring capabilities, but some do have sailing rigs. They're designed to be small tenders that you either drag behind your bigger boat or put on deck. They nest, the bow section fitting inside the stern section, so that they take up even less space on deck. It's pretty cool stuff.
New York apartments are not unlike sailboats. Space is a premium. So: what if you got a nesting dinghy, put it on wheels, and stood it in your apartment in place of, say, a dresser. I don't have a dresser. And I do have room for one in my room. So. Let's build a nesting dinghy!
This is going to be awesome.
There's a few nesting dinghy plans to choose from. Here were the four-ish I looked at. There are others out there, but these seemed to be the most professional-looking ones.
This boat (and it's smaller cousins) is nice. It has a lovely hull shape and an interesting construction method. The nesting option is also one of the more compact of this bunch, especially for its size. You lose a little bit in terms of aft-section seating space, but there other builders have suggested adding a removable extension to the seats.
This, also, is the boat I'll be building.
This was actually the first nesting dinghy that I heard about. The one that got the cogs in my head turning. It's an adorable little boat, but it is a little bit too small for my taste. I'd like to be able to fit two people on the boat, because sailing solo is fun, but sailing as a pair is also fun. Anyway, the boat is really cute. Check out the video they link on their website.
This is the Nesting Pram's bigger cousin. It's a lovely boat, but it is about 11.5 feet long and only gets down to 7.75 feet when nested. As such it's rather too big for getting through apartment (and subway!) doors.
This boat is gorgeous! And too big when nested. And VERY expensive. But so beautiful. Just go and look at it.
So I thought I'd have to build the boat in New Jersey. I have access to a house and garage and woodworking equipment there. Not boat building equipment. But my family does a fair bit of solid wood furniture repair and refinishing. But New Jersey is far away. At least the house and garage. A long way away.
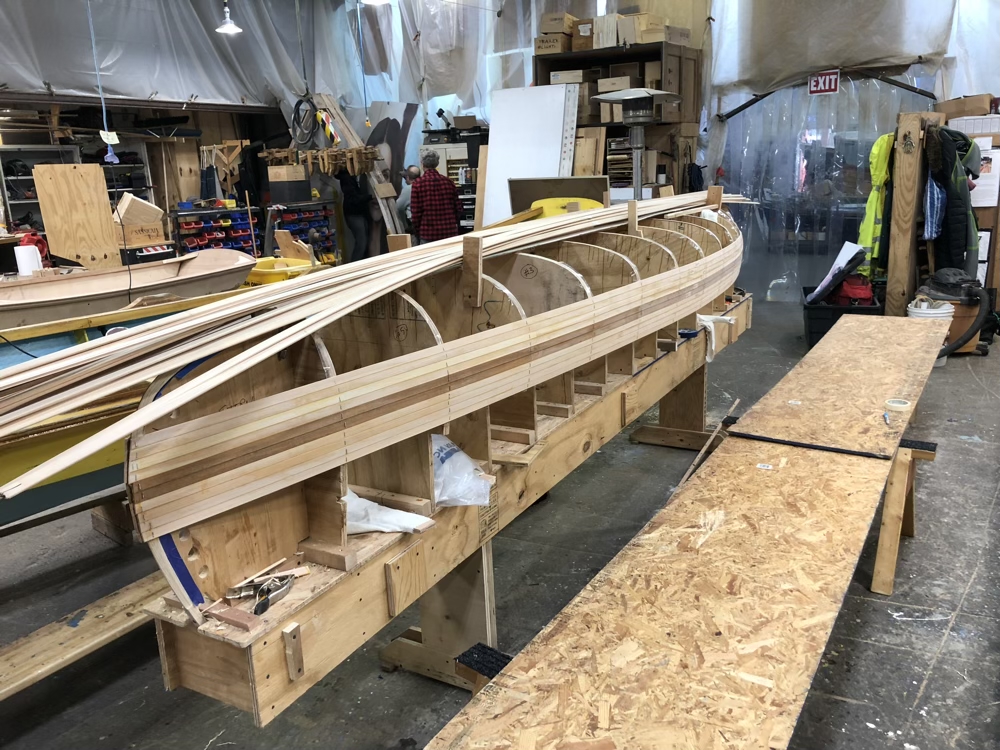
So while looking for a place to launch the boat (more on that another day), I came across the Village Community Boathouse. This is awesome. It's a wooden boat building and rowing community. They primarily build Whitehall Gigs, the classic working rowboat of the New York Harbor. As they like to say, these are the boats Washington would have used to cross the river back in the Revolutionary War.
Anyway, the VCB is great! They build boats. They're actually working on a commissioned sailboat that has a similar construction style to the Spindrift I'm planning to make. So while waiting to hear back from the board about building my own boat there, I can help on that project and learn.
If you have interest in boat building and you live in the city, I'd encourage you to stop by! There might actually be other boathouses in other parts of the city, but this one a pretty convenient walk (or bike ride) down Houston Street from my apartment across town!
So I need to make a decision. Do I want to get just the plans and sailing hardware from B & B for the Spindrift, and purchase the plywood and other wood from the Village Community Boathouse? Or do I want to pay extra for the CNC-cutting (and shipping) of the complex pieces at B & B? I guess I would have more control over the specifics of the hull shape that way (I've read that some people like to build it a couple of inches taller to lessen the amount of water that splashes into the boat while underway in choppy waters). But then I'd be the one trying to trace and cut a tricky contour. And I don't really want to change the hull shape that much. Now that I've gotten estimate quotes from B & B and from VCB, I think I'm close to making a decision. The cost difference is about what I'd be willing to pay for the convenience of the CNC cuts. So ya. Unless things change in the near-ish future, I'll be getting the pre-cut kit form of the Spindrift. Soon!
Got the green light from the Village Community Boathouse board to build the boat! I'll be chatting with the folks at the boathouse this weekend to finalize some of the decisions and plans. My hope is that I'll be able to start building (or at least have the materials ordered and on their way) by the end of the month! So exciting!!
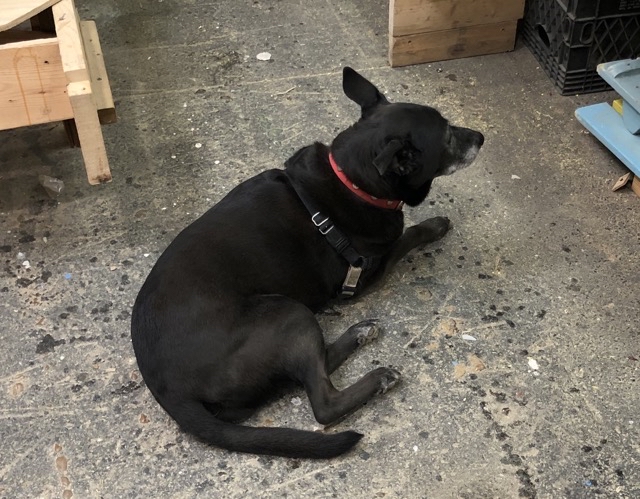
So while I wait for the quote for the final kit, I've been going to the boathouse to help work on other projects and learn as much as I can. And this weekend I met Katie, the boathouse dog! She is a lovely gal. Very chill. She was quite comfortable hanging out under the table where I was using a loud circular saw to cut some wood for a couple of seats. Such a boss.
I've also learned that doing a more and more careful measurement is probably more expedient in the long run than cutting way oversized and then trying to trim back. Trimming is time consuming!
An exciting day! I've finally ordered the kit for the boat! Should be ready and shipped in a couple of weeks! There were some concerns about getting it delivered to the boathouse but I found that I can actually have it shipped to my office and then bring it to the boathouse on a hand truck! B & B will be sending it in two packages to make it a little bit easier to transport. So for now I wait and go to the boathouse and learn and prepare! I'll do some more research in the meantime about the way I might modify the seats in the aft section to make them full-length.
So exciting!
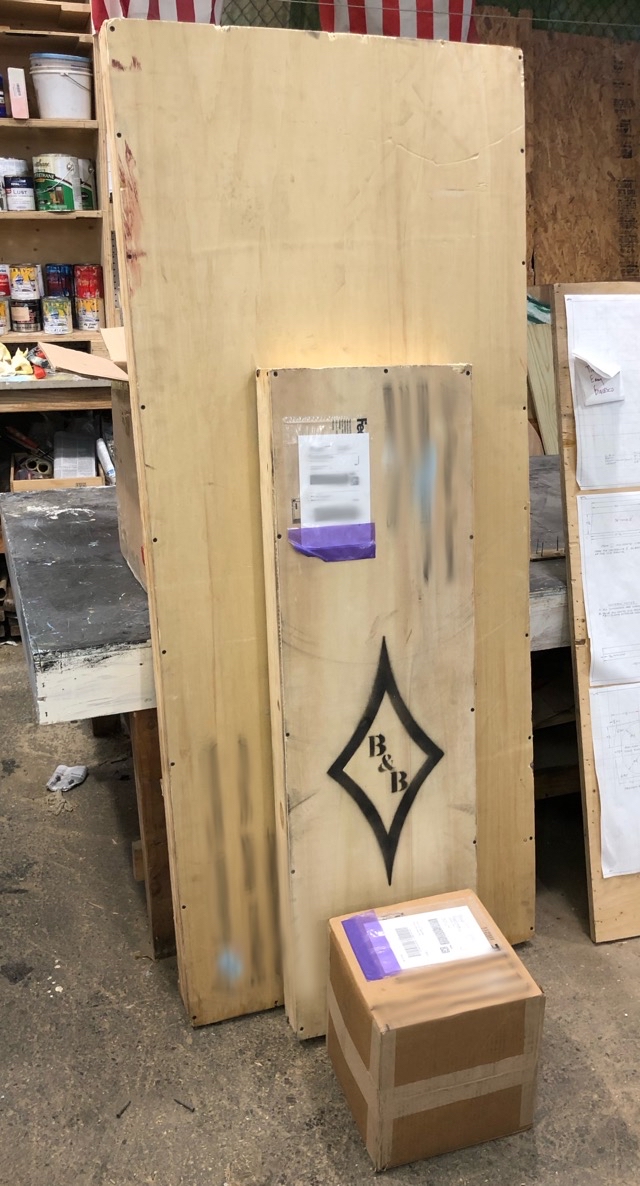
The kit has finally arrived. Getting it from my office to the boathouse was a bit of a messy job in the rain, but I got it there in the end! Going to be unboxing and getting things ready for construction next time I'm at the boathouse (hopefully this Sunday).
In the meantime I've been reviewing the plans and documentation and trying to visualize and prepare to build this boat right the first time.
Still so exciting!!
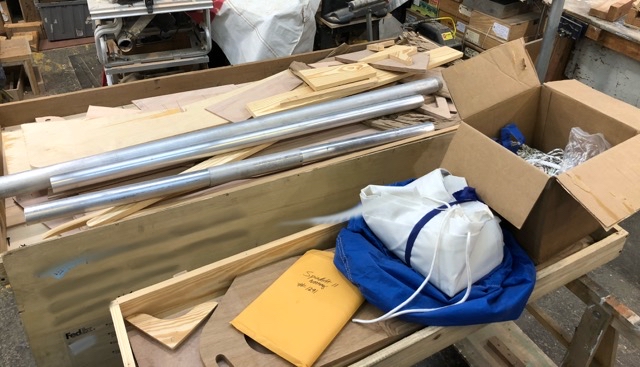
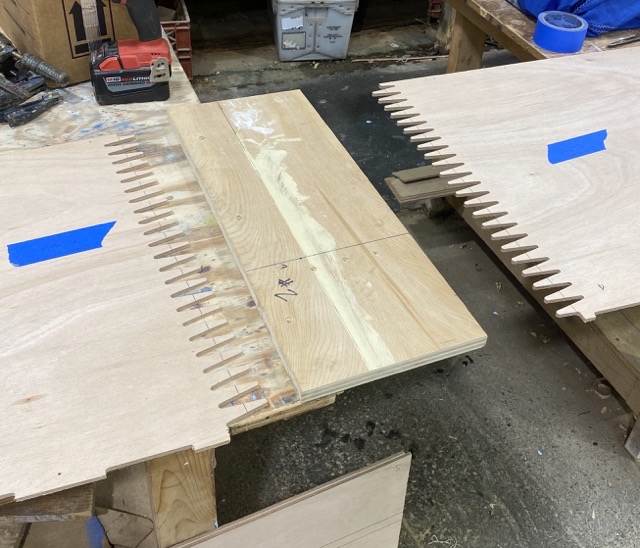
The kit and parts look good! Almost all of the parts are accounted for. A couple of the finger joint fingers were a little cracked or broken, but they don't interfere with the fit. They'll be just fine once we glue the fore and aft parts of the hull sheets together.
Speaking of which, I've dry-fit the main hull sheets and the dimensions look good. I love the accuracy and quality of the CNC cut parts. The quite inspire confidence that the boat will come together alright.
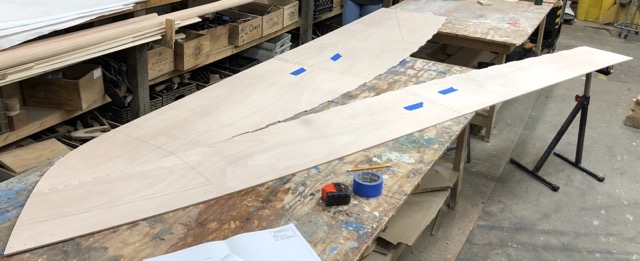
Looking forward to starting to glue these sheets together and hopefully see the butterfly emerge from the hull in a couple of weeks!
The boathouse is closed. Everybody is socially distancing. Keeping each other safe. So work on the boat is currently paused. Thinking now that perhaps if I had decided to build it in a garage, I might still be able to work on it. Though that would require going to the house and potentially exposing folks that shouldn't be exposed to The Virus. So probably wouldn't make a difference anyway. The boat build is going to be delayed a few months at this point. I'm disappointed, but not much to be done. I can study the plans and the instructions and plan and hopefully be ready as soon as the world is sane once more.
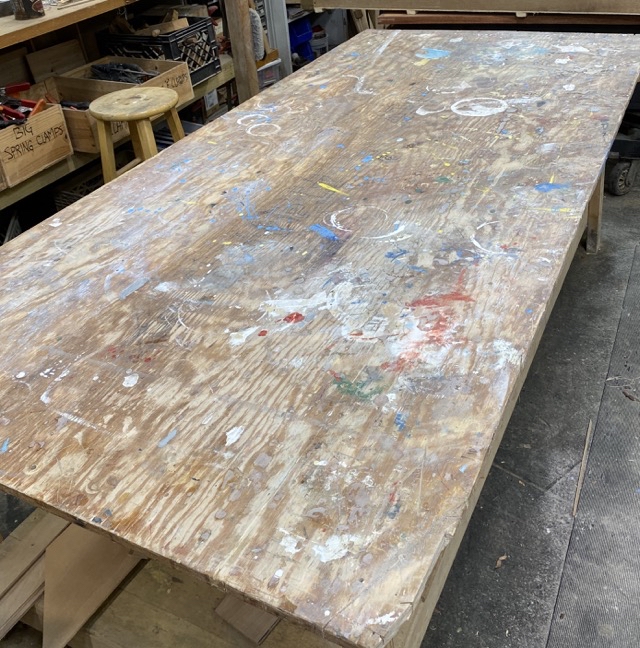
Well, the boathouse isn't really doing their usual public activities, but I'm able to go and work on the boat again! Going to have to work on a different table, so I spent this evening getting it cleaned and sanded and figuring out exactly what to do next. Looks like the first step is going to be to join the long pieces of the hull into longer pieces of the hull. I'll probably do one half of it this weekend, depending on how long it'll actually take and how finiky the epoxy is going to be.
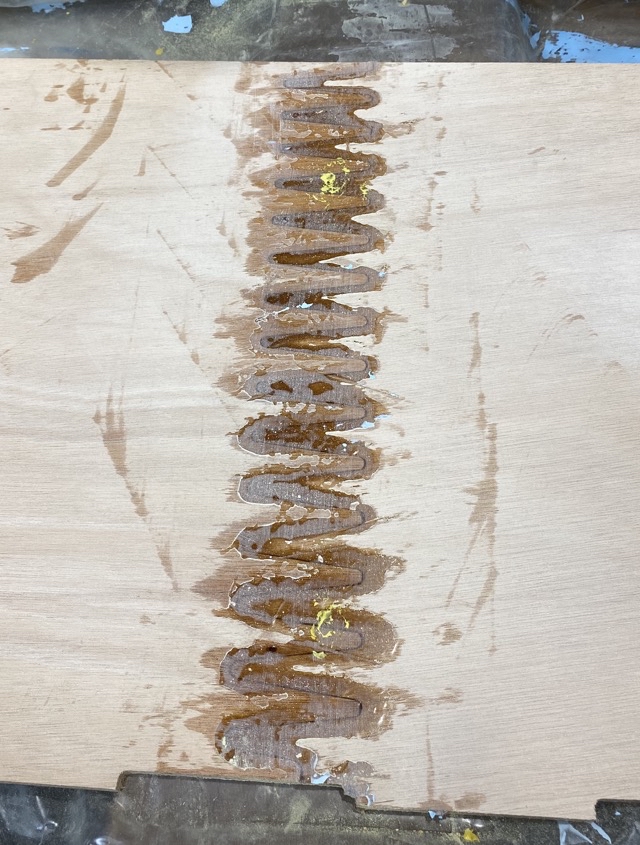
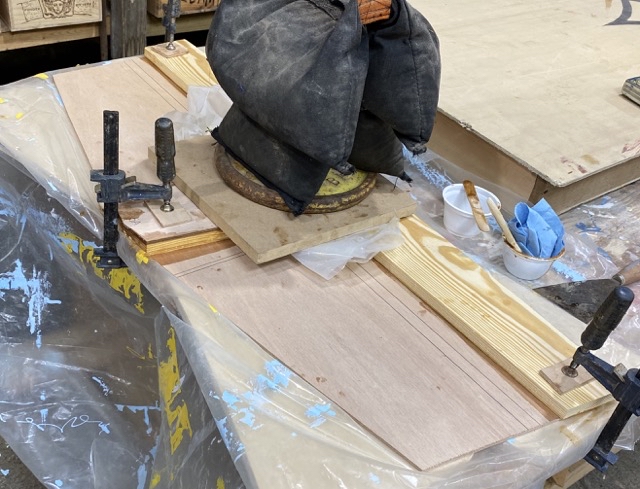
Glued up the first joint today! These are the two pieces of the starboard side top panel. They come together with a finger joint. Brushed the surfaces with wet epoxy, then thickened the epoxy and applied to both sides the joint. Clamped the forward piece to the table, stuck the aft piece into place, clamped, and put a board and some weights on top. After cleaning up the squeezeout that I could get to. There's a sheet of plastic between the glued panels and the clamping boards, so hopefully things won't get stuck. Ended up with a bunch of extra epoxy, but better more than less, I guess. It did warm up as I was working on it, but it was still goopy enough at the end. We'll see tomorrow! I didn't put any fiberglass on this joint. I'll probably put a layer on the inside of the bottom panels but the top panels should be alright. Will check on the joint tomorrow. If it's nice and solid and straight, I'll clean it up, and then do the port side top panel on top of it to make sure that they end up with an identical shape.
It's been a busy week!
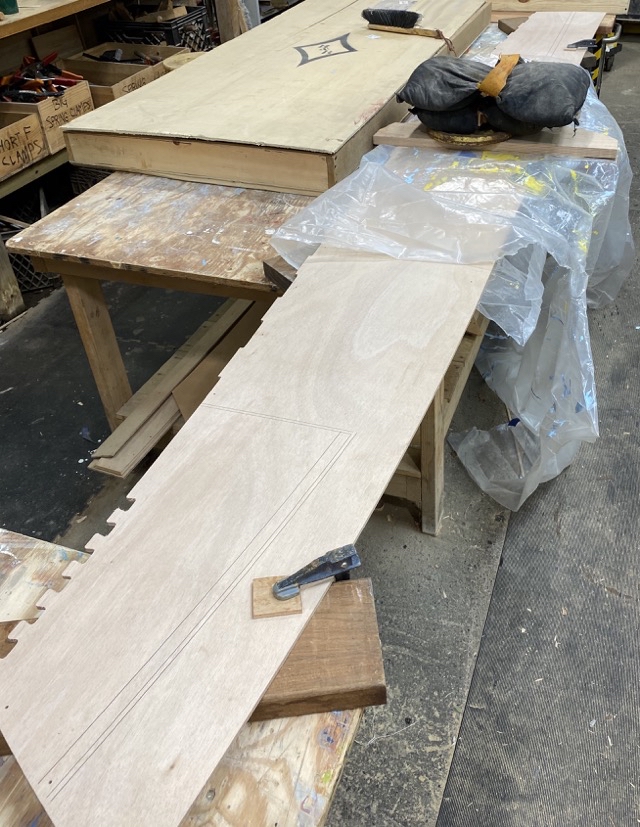
The first joint is pretty good. It isn't exactly flat, but it should still work well enough. I learned a bunch during the process and the the next few panels got better and better. I even set up a little table extension to have the least twist and most clamping points available!
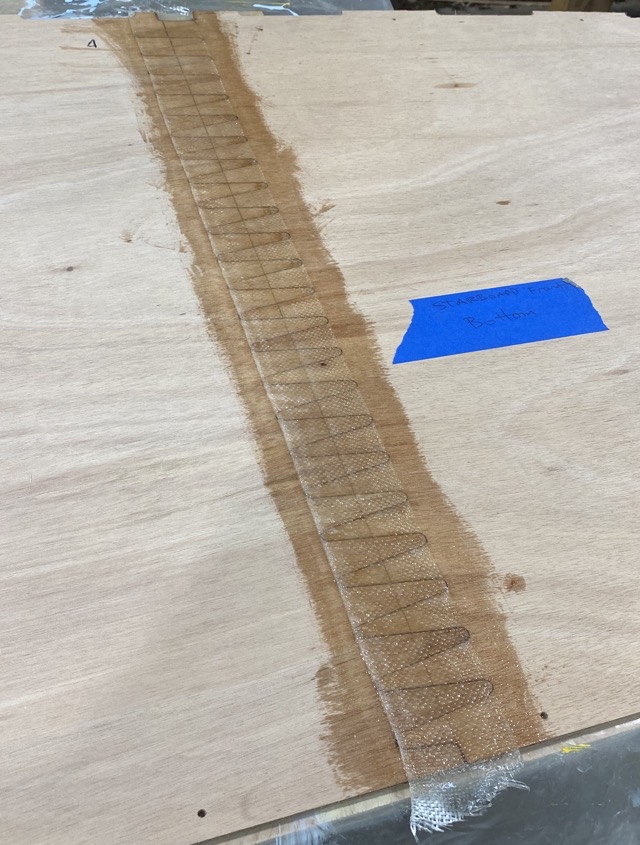
I used some fiberglass on the inside of the bottom panel joints. It's a little narrower than I'd like, but it should work well enough. It is mostly there to have the added confidence that I won't step through the boat accidentally.
My final glueup had all the clamps and all the weights and it was super solid!
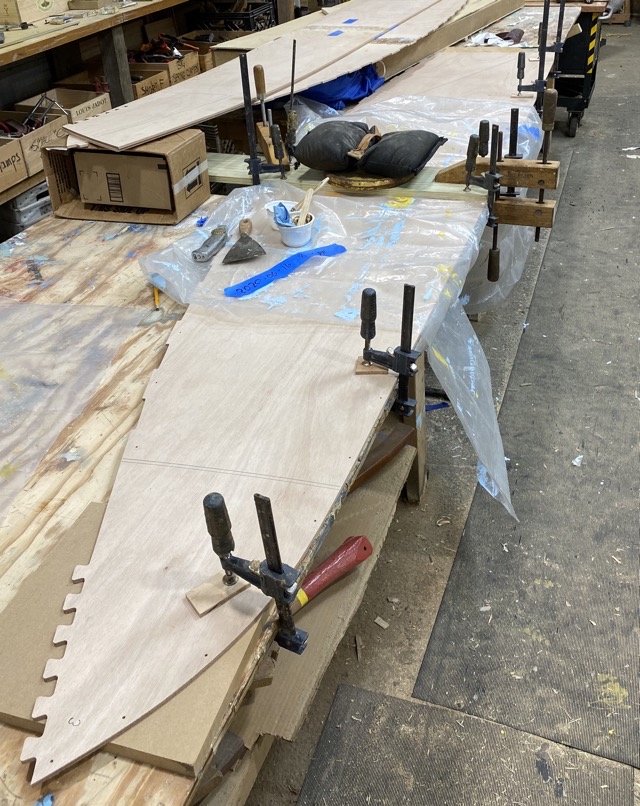
The resulting panels ended up being within 1mm of each other so the joints were apparently quite consistent. There's going to be a bit of epoxy to clean (and the plastic I was using had some paint that transfered as well). But That should be easy enough. The panels seem strong and have held up without any sign of trouble as I've been moving them around the workshop.
Now that the long panels are done, I've started on the transom (that's the back panel of the boat). This was a pretty straightfoward glueup. Unfortunately the way the weights and the clamps ended up, I have a bit of squeezeout in an inaccessible place. I couldn't get clamps on the far side of the transom, so I had to use weights instead. It shouldn't be too much of a problem, I'll just need to be a bit more vigorous with the cleanup. It's all probably going to be painted anyway, so no big deal. Maybe I should have tried to glue and clamp things in the air off the table, but I didn't really trust the clamps to apply enough pressure to the very middle of the transom.
Nesting bulk heads will be next, and then it'll be time to start putting the main panels of the boat together.
This boat is going to be all kinds of frumpy and dented and full of character. It's going to be awesome!
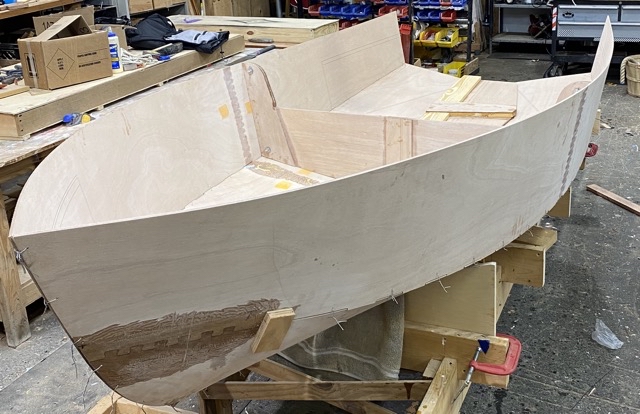
So exciting!! After a lot of work and plywood-wrangling, I have a boat-shaped thing! It was really cool to see the shape of the boat come up out of the flat pieces on the cradle! I had to re-stitch the keel line and I think I messed up the holes and temporary glue-up of the nesting bulkheads. But that's fine. The important thing is that the boat is no longer a bunch of flat pieces on the table, awkward to maneuver and constantly getting in the way. The boat is now a boat in its cradle! And it's pretty big! It was starting to look big from when I had joined the main panels, but it continues to look very sizeable now that it's close to its final shape. I stayed up at the boathouse later than I probably should have, so I'll probably need to fix or re-do some of the work. And, again, definitely will need to re-glue the nesting bulkheads together. And fill and re-drill the holes for the bolts that hold them together. But that's fine. The boat is looking like a real boat thing!! I just can't contain my excitement!

Looks a bit like a shark, doesn't it? With the smudge of epoxy and the jigsaw meshing seam. Might consider something along these lines for the final paint job...
So the gunwales have been done for a little while now, and I've actually done some of the inside already. But here we are, a little behind on writing about it. I did some planning and some figuring and decided that I would be able to finish the boat by the beginning of August. Which is soon. And then got a little too excited and worked way more on the boat than was probably healthy. I've since eased back a bit. So now I've got time to sleep. And update this blog. Because I need to be alive and healthy to build and sail the darn thing, don't I?
The gunwales were tricky to put on. I had help, thankfully. I'm not sure how I could possibly have done the work on my own. I mean, there was all the cutting and planing to get the ash strips ready to make the gunwales. Did you know, for example, that the sign of a dull electric planer is that it leaves a bad finish? If the planer blades are sharp, it shouldn't make much noise, heat your wood to a charred zebra-striped finish, or jam occasionally. Live and learn, I guess. Anyway, the wood strips were long and wobbly and I definitely needed help getting things cut and planed and beveled. And then there was the epoxying and clamping. Had to clamp a couple of times on and off while things were dry to figure out the right shape. Turns out you more or less have to start from the front and move back steadily. Can't jump back and then come in the middle to clamp things, or you get the wrong shape.
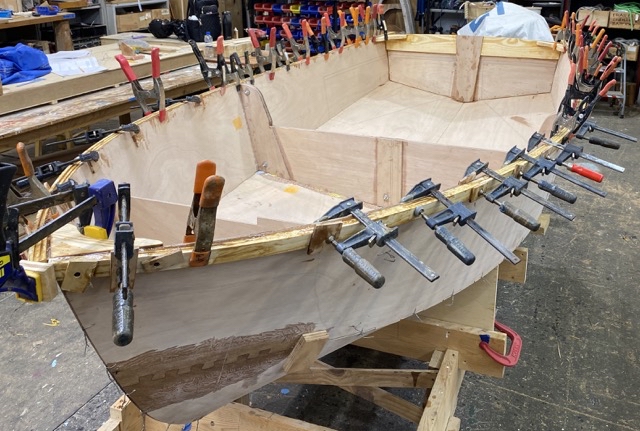
Anyway, I couldn't have done this without the help of my wonderful helper. Thank you, helper!!
The shape is pretty good. The curve is a little off and backwards in the front where the clamping force wasn't hard enough to pull the sides of the boat out. But it's not too bad. It's pretty subtle and it's even on both sides. So, with a bit of extra epoxy to fill a little gap that formed, we have pretty solid gunwales. A bunch of planing and sanding and the boat is sturdy, indeed.
As I write this, the inside seams are all filletted and glassed, the nesting bulkheads are epoxied and glassed, and the forward bulkhead is curing. Next adventure: modify the back seats (the designer sent me an update to improve nesting functionality, which is very important to me). And then start coating the inside with epoxy and maybe even cutting the boat in half this weekend or next week!
So, making good progress, but chilling out so that I'm not at the boathouse rushing to finish epoxy work in time to get off the pier before the gate closes. Because that's how I ended up with a bunch of messed up glass to fix and not enough sleep. Lessons learned, indeed.