
You can publish to your WriteFreely / Write.as blog on the go with the WriteFreely iOS app.
This guide will introduce some of the features of the app, and how it works with your WriteFreely account. It requires an iOS device running iOS/iPadOS 14.0 or later; you can download it on the App Store.
You don’t need to log into any account to begin writing. The app will launch straight to the post editor, where you can start writing a local post that only exists on your device — they’re not synced anywhere until you explicitly publish them to the server.
Give your post a title by tapping where it says “Title (optional)”, and then tap on “Write…” below it to being writing your post. New local posts are automatically added to the blog you’re currently viewing (in this case, Drafts), and they’re saved automatically when you leave the post editor, or load another post. Blank posts are deleted when you navigate away from them.
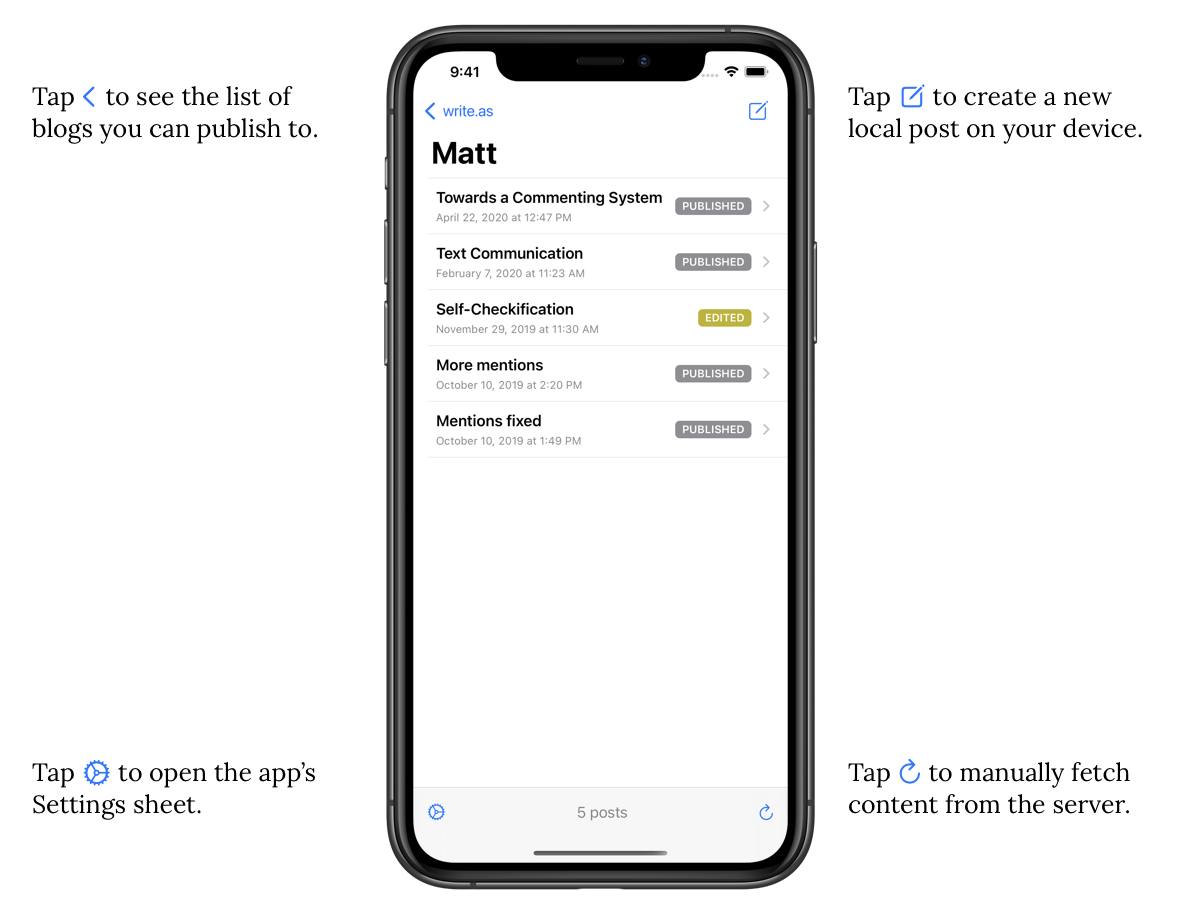
To create another new local post, tap the New Post button at the top-right of the post list. You’ll see a new post added to the top of the list, and it should load in the editor right away.

Tap the Settings button at the bottom-left of the post list to open the app’s Settings screen. At the top of the screen, a form prompts you to log in to publish and share your posts. Enter your username and password, as well as the URL of the WriteFreely instance that hosts your account. For Write.as accounts, use https://write.as as the server URL.
⚠️ To keep your account secure, the app will not communicate over an insecure connection. If you provide an address with the http:// protocol, it will attempt to connect over https://. If it cannot, you’ll get an error message.
Once logged in, the app will fetch all of the posts and blogs in your account. Any local posts you’ve created are kept after logging in, and you can then publish them to your blog. See the Working With Posts section for details.
⚠️ Tapping Log Out in the Settings screen will disconnect the app from the server and remove all your published content from the device, including any changes you’ve made that you haven’t pushed to the server. As of v1.0.1 of the app, your local posts are preserved.
Below the login form on the Settings screen, you can define some appearance preferences. You can choose whether you prefer to use the app in light mode, dark mode, or to have it switch based on your system settings.
You can also choose the default font for new local posts created on the device. This does not override the font used in existing posts; you can only change the font for published posts from the web application.
The WriteFreely app uses a typical three-level hierarchy, much like the Mail app on your iOS device. Choosing a blog in the first column will show you its posts in the second column; choosing a post from that list will load it for you in the post editor.
On a 12.9" iPad Pro in full-screen landscape orientation, you can see all three columns at the same time; on other iPads in full-screen landscape orientation, you’ll see the post list and post editor at the same time. Otherwise, use the navigation button at the top-right of the screen to navigate back on iPhone and on iPad in portrait or split-screen orientation.
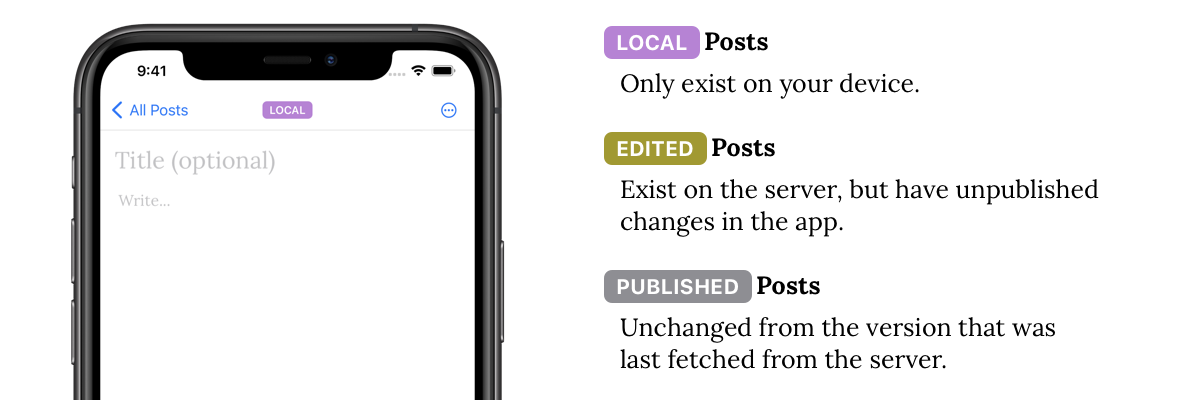
In the app, posts can have one of three statuses:
Generally, there are three actions you can take on a post: publishing, sharing, or moving. These are made available by tapping on the Menu button at the top-right of the post editor.

A local post can only be published. Choose Publish… from the menu and you’ll be presented with a list of blogs you can publish the post to. If you’re not logged in, trying to publish will open the Settings screen and prompt you to log in.
A published post can be shared or moved; an edited post can be published, shared, or moved.
Choose Publish from the menu to publish the changes made to an edited post back to the server. This changes the status of the post from edited back to published.
Choose Share from the menu to open the system share sheet, where you can send a link to your post through any compatible app on the device.
Under the Move to… section of the menu, tap the name of the blog you’d like to move the post to. The checkmark indicates what blog the post currently belongs to.
To make a local post available on the web or another device, publish it to the web as a Draft (“Anonymous” post on Write.as).
The app periodically fetches your content from the server automatically. You can force it to fetch by tapping the Reload button at the bottom-right of the post list.
⚠️ Note that this never replaces the content on your device with content from the server. If a post has been changed or deleted on the server, you’ll be shown this information when you view the post in the app. You can then choose to make the same changes in the app.
Need help? Tap Visit Help Forum in the app’s Settings screen to be taken to the help forum where you can ask a question or search for answers.