The video is only 10m, but in case you don't have time to watch it, here's a summary.
Webassembly (WASM) is a hot new technology which, among other things, lets you compile and run C programs in the browsers.
WASM programs are sandboxed in the same way JavaScript is, but that in itself doesn't make WASM programs invulnerable to attack.
In fact, WASM programs are often even more vulnerable than their native counterparts due to a lack of standard mitigation techniques like ASLR, stack canaries, etc.
Attacks which may be difficult or impossible against a native executable may be easy against the same program compiled to WASM.
And if an attacker can gain control of a WASM program, they can then use that as a foothold to attack the larger system.
They give an example in the video of a C program which converts a PNG image to JPEG and displays in the browser; they exploit a buffer overflow in the PNG parser to take control of the program and execute arbitrary javascript in the browser.
My takeaway: Unsafe languages are still unsafe, even when compiled to webassembly.
Stop using C!
Webassemby promised to make computing safer by sandboxing programs. But a sandbox isn't magic pixie dust - it doesn't make security problems go away, just helps isolate them from the rest of the system. For a system to use a sandbox in a secure way, code that interacts with the sandbox has to treat its output very skeptically. You have to assume the program in the sandbox might be compromised and act accordingly. But one of the other promises of webassembly is easy cross-language interoperability, and moreover developers are lazy, so i doubt that is going to happen.
Stop building things in C (and C++)! Until we fix the problems at the root, no amount of duct tape at other layers is going to make buffer overflows and memory-safety problems disappear.
Recently I've been getting back into pokémon datamining.
One of the things i wanted to find was the dex sprites in Sun & Moon
— the charasmatic poses that slowly fill the Alola dex as you encounter and catch each pokémon species.
While most of the game uses animated 3D models or small icons of the pokémon,
the pokédex is one of the few exceptions.
Source: pokemon.co.jp
Veekun has sprites for Sun & Moon but they aren't the dex sprites.
They look like they're just a static capture of the first frame of the pokémon's idle animation.
As i later learned, these are actually the images that show up on the screen
behind the nurse when you heal your party in a pokémon center.
They're Very Boring. The dex sprites are much more characterful:
The remainder of this post will be a sort of stream-of-consciousness explanation of how i went about finding and extracting these sprites.
Partly as a reminder for my future self, but also for any aspiring ROM hackers who might be interested.
Ok. The first step is to mount a copy of the ROM using ctrfuse
or ninfs.
./ctrfuse -s Moon.3ds ./moon
Next we have to find the file that the sprites are in.
They aren't listed in
this list of files from the demo
(just the icons, in a/0/6/2).
Either they aren't labeled or they are missing.
The full games added a bunch of files, so that could be the case.
I guess I'll have to search for them myself.
Sprites are usually one of the largest files, so let's sort all the new files by file size.
% ll 2/[456789]/* 3/*/* -S
-r--r--r--. 1 root root  17M Dec 31  1969 2/9/3
-r--r--r--. 1 root root  17M Dec 31  1969 2/9/4
-r--r--r--. 1 root root  17M Dec 31  1969 2/9/5
-r--r--r--. 1 root root  17M Dec 31  1969 2/9/6
-r--r--r--. 1 root root  17M Dec 31  1969 2/9/7
-r--r--r--. 1 root root  17M Dec 31  1969 2/9/8
-r--r--r--. 1 root root  17M Dec 31  1969 2/9/9
-r--r--r--. 1 root root  17M Dec 31  1969 3/0/0
-r--r--r--. 1 root root 6.7M Dec 31  1969 2/4/0
-r--r--r--. 1 root root 5.1M Dec 31  1969 2/6/9
-r--r--r--. 1 root root 2.0M Dec 31  1969 2/4/9
-r--r--r--. 1 root root 2.0M Dec 31  1969 2/8/1
...
Ignore the 17MB files at the top. They're too large and regular to be what we're looking for.
That leaves a/2/4/0 and a/2/6/9.
a/2/4/0 is where the other sprites were, so let's try a/2/6/9.
Viewing it with viewgarc.go shows 854 records of 0x10028 bytes each.
That's enough records to plausibly be pokémon sprites, and they're large enough to be images
(0x10000 is 256x256 bytes).
Let's extract them and take a closer look.
% go run viewgarc.go -z a/2/6/9 | most
% go run extractgarc.go a/2/6/9 ~/pokemon/dumps/a269/
Examining one of the records shows that it is definitely some sort of image:
See the tell-tale FLIM and imag?
That's a BFLIM header. (Or footer, as it were.)
I went through a couple dead-ends trying to decode these.
First with 3dstex
and then etc1tool,
neither of which worked.
Eventually i broke down and used eevee's code from
pokedex.extract.lib,
which i extracted into a
standalone package.
% for file in *.0; do ~/src/flim/bin/python -m flim "$file" >"png/${file%.0}.png"; done
Decoding is super slow — which was why i had been trying to avoid python — but it works.
And hey! Looks like i was right and these are indeed the dex sprites.
Last step is to rename them to something useful.
The sprites are in national dex order, but not every pokémon has a sprite —
only those in the Alola dex — so the first sprite is Caterpie.
All the forms for a given pokémon included in sequence with that pokémon,
and after each sprite is the shiny version of the sprite.
For pokémon with gender differences, the female sprite comes before the male one.
Only the base form can have gender differences; alternate forms cannot themselves have gender differences.
For example, Ratatta's sprites are in the following order:
Rattata-f
Rattata-f (shiny)
Rattata-m
Rattata-m (shiny)
Alolan Rattata
Alolan Rattata (shiny)
I'm sure there's a data file somewhere that maps each pokémon to its sprite,
but i'm too lazy to go looking for it and veekun already has most of the data anyway,
so intstead I cooked up an awful SQL query to do it.
(For US/UM, change the version group id to 18 and the pokedex id to 21.)
with pokemon_forms_with_genders as (
    select id, identifier, form_identifier, pokemon_id, introduced_in_version_group_id, 1 as gender_order from pokemon_forms
    union select id, identifier||'-f', 'female', pokemon_id, introduced_in_version_group_id, 0 as gender_order from pokemon_forms pf
          where true = (select has_gender_differences from pokemon_species ps join pokemon p on p.species_id = ps.id where p.id = pokemon_id and p.is_default) or pf.identifier = 'spinda'
    union values (10220, 'zygarde-10-power-construct', '10-power-construct', 10118, 17, 2))
select (row_number() over (order by ps.id, p.id, gender_order, pf.id))*2 - 1 as "file",
       ps.id, pf.identifier, coalesce(pf.form_identifier, '')
    from pokemon_species ps
    join pokemon_dex_numbers dex on ps.id = dex.species_id and dex.pokedex_id = 16
    join pokemon p on p.species_id = ps.id
    join pokemon_forms_with_genders pf on pf.pokemon_id = p.id
    join pokemon_form_generations pfg on pfg.pokemon_form_id = pf.id and pfg.generation_id=7
    where pf.introduced_in_version_group_id <= 17;
From here, it's a simple matter to get postgres to write out a TSV file and then use standard unix tools to convert that into a bunch of cp commands to do the renaming.
% psql -tA -F $'\t' -o /tmp/dex-sprites.tsv pokedex <sm-dex-sprites-query.sql
% cut -f 1,2,4 /tmp/dex-sprites.tsv | while read i n form; do
>  echo cp -i "png/$i.png" "normal/$n${form:+-$form}.png";
>  echo cp -i "png/$((i+1)).png" "shiny/$n${form:+-$form}.png";
> done >tmp/name-sprites.sh
% mkdir normal shiny
% bash /tmp/name-sprites.sh
Some of the sprites are blank (mostly totem pokémon); we can delete those.
Now just optimize them and they're pretty much ready to add to pokedex-media!
% optipng *.png
% advdef -z3 *.png
Gotta Catch 'em All
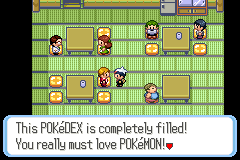
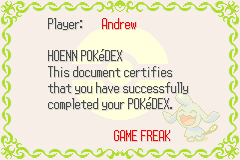
Sixteen years (or so) ago i started my first pokemon adventure in Pokémon Ruby. Sixteen years and 392 hours of gameplay later, I finally completed the pokédex.
Generics in Go
I'm enjoying seeing how the draft design for generics in Go has evolved. In particular, how it has gotten simpler over time.
// A contract is a function body which demonstrates how to use the type(s).
// Here, the stringer contract says that the type T must have a
// String method that takes no arguments and returns a string.
contract Stringer(x T) {
    var s string = x.String()
}
People complained that contract bodies were hard to read and hard to write (which they were).
The next draft drastically simplified the syntax.
// The contract syntax has been simplified to directly list the methods a type must have.
// As above, the stringer contract says that the type T must have a
// String method that takes no arguments and returns a string.
contract Stringer(T) {
    T String() string
}
This fixed the readability, but now contracts seemed to overlap heavily with interfaces.
// Contracts have been unified with interfaces.
// The standard definition of Stringer as an interface
// now works as a type constraint too.
type Stringer interface {
    String() string
}
It would be possible for me to (almost) stay on top of my affairs if I abandoned the notion that a primary element of my life is being a guitarist. Guitaring, at the level to which I aspire, would result in no-one who sends me an e-mail receiving a response. There would be an even greater pile of papers on my worktop (sofa-table covered by a rug). Flowers and shrubs in the garden would wither. My Wife would despair, to an even greater length than currently, on hearing phrases rising from the Cellar for hours on end. Repetitive fragments of Fracture is not a highspot of Toyah’s day...
I feel sort of similar about programming.
I know how to throw myself into a project.
Conversely, i can sometimes abandon the computer for a while and deal with life.
What i don't know is how to balance the two.
my favourite albums of 2018
A Perfect Circle - Eat the Elephant (2018)
Animals as Leaders - The Joy of Motion (2014)
clipping. - Splendor & Misery (2016)
Gorillaz - The Now Now (2018)
Jeroen van Vliet - Wait (2013)
Leprous - Malina (2017)
Pentatonix - PTX Volume IV, Classics (2017)
Riverside - Wasteland (2018)
Sylvan Esso - sylvan esso (2014)
yOya - The Half Turn (2018)
Notes on setting up Wireguard
Prerequisites:
Linux 5.6 with wireguard enabled
On the server side (Fedora 31)
dnf install wireguard-tools
ip link add dev wg0 type wireguard
ip addr add dev wg0 192.168.42.1 peer 192.168.42.2
# Our server is going to have the wireguard IP 192.168.42.1.
You can use any private network address that isn't in use by an existing interface.
wg set wg0 private-key <(wg genkey)
wg set wg0 listen-port 1234 # can be any port number. most wireguard tutorials use 51820 but i'm not sure why
( umask 077; wg showconf wg0 >wg.conf ) # save your configuration
Firewall rules:
firewall-cmd --zone=internal --add-source 192.168.42.1/24 add wireguard network to the firewall rules
firewall-cmd --zone=internal --add-port 1234/udp open the wireguard port
Now we're going to generate a key for the client.
( umask 077; wg genkey >phone.privatekey )
wg pubkey <phone.privatekey >phone.publickey
wg set wg0 peer $(phone.publickey) allowed-ips 192.168.42.2/32 # note: allowed IPs is the wireguard IP associated with the peer, not its public IP address
( umask 077; wg showconf wg0 >wg.conf ) # save your configuration
[Peer]
PublicKey = $(wg show wg0 public-key)
Endpoint = 1.2.3.4:1234
AllowedIPs = 192.168.42.1/32
EOF
1.2.3.4 is your server's public IP address.
again, the allowed IP is the wireguard IP, not the server's public IP.
dnf install qrencode
qrencode -t ansiutf8 <phone.conf # will print out an ASCII art QR code to your terminal
Open WireGuard. Touch the (+) button. Touch the QR code option. Scan the QR code. Enable the newly-created interface.
Open Termux. If ping 192.168.42.1 works, everything is set up correctly.
You should also be able to ping 192.168.42.2 from the server
Making it stick (added 2021-12-26)
In order to get the server to remember its settings we need to do a couple more things. Otherwise it'll be reset to a blank state when rebooted. (The android app remembers your configuration for you, so doesn't need this step.)
wg showconf wg0 > /etc/wireguard/wg0.conf
sudo -e /etc/wireguard/wg0.conf
[Interface]
PrivateKey = {redacted}
Address = 192.168.42.1/24 PostUp = /usr/sbin/ip addr add dev %i 192.168.42.1/32 peer 192.168.42.2/32
most of this should have been filled in automatically by showconf -
except the PostUp line, which you need to add yourself or the connection won't work (important!)
This article from the Haskell wiki just popped up on HN: Do notation considered harmful,
and i have to strongly disagree.
Do notation is a wonderful simplifying syntax — it takes several concepts and unifies them into one, clean notation.
A couple years ago i wrote (as a joke) a simple calculator in Haskell which freely intermingles parsing and I/O and manipulation of state — which you're not supposed to be able to do in Haskell.
In the process of cleaning it up and attempting to make it more readable to people who might not be super familiar with Haskell,
i replaced all the various >>, >>=, <*, *> operators with equivalent code using do.
And it was better!
The code was more readable and now i only had to explain one concept (do)
that was used everywhere instead of bunch of operators that were each only used in a few places.
Sure, there were a couple instances where the do-using code was a little clunkier but on the whole it was an improvement.
Note: from the comments on the HN post,
it looks like my view is shared by many Haskell developers and that the wiki article is outdated.
building alacritty
Building alacritty from source [1]...
downloads 160 dependencies (~122 MB source + metadata [2])
generates 576MB of build artifacts [3]
and finally produces a 49 MB executable.
The whole process takes 29 minutes on my machine,
including something like 8 minutes just for the final link.
This seems a little ridiculous.
My goal here isn't to point a finger at alacritty —
i'm sure it's doing a reasonable job under the circumstances —
but to ask questions about modern software development.
git clone 'https://github.com/alacritty/alacritty'
cd alacritty
cargo build --target release
[2]:
find ~/.cargo -mtime -1 -type f | xargs du -c | grep total | cut -f1 | fmt | tr ' ' '+' | bc
[3]:
du --si -s target/
Chip's Challenge: NES tileset
I've been working on my Chip's Challenge disassembly recently and i needed a 16x16 tileset for a patch i wanted to try.
It turns out that the prototype port for the NES uses 16x16 tiles!
Let's dump the art and turn it into a tileset.
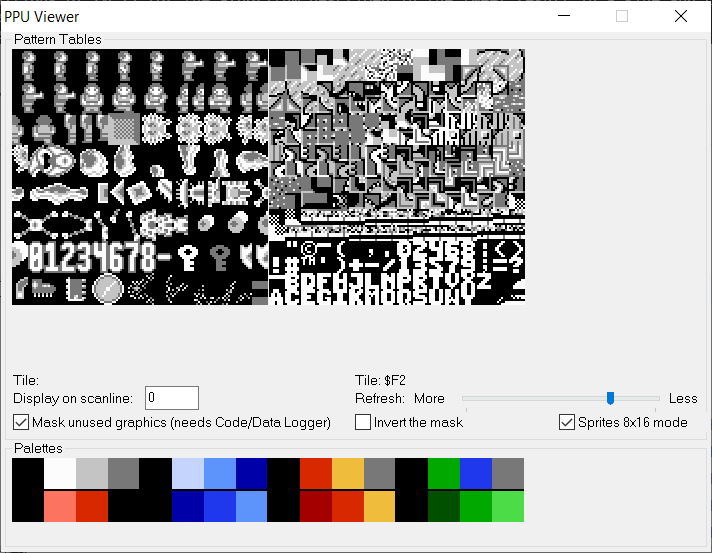
Normally my approach would be to approach this all statically — look at the ROM in a hex editor, find the image data, and write a script to extract it. But i was feeling lazy, so instead i fired up FCEUX and opened the PPU debug window, which shows the contents of the NES's video memory.
Hmm, not perfect but it's a start.
The NES uses 8x8 tiles internally, but the CC tiles are 16x16 so they are composed of four 8x8 tiles.
FCEUX has helpfully arranged them in little squares for us; it's working pretty well in the bank on the left but not on the right. The right bank looks super garbled because there's a stray 8x8 tile at the beginning of the bank before the rest of the tiles, throwing everything off. Easy enough to fix.
At this point my normal approach would be to write a script with a bunch of hardcoded tile offsets that reads in the tile banks and spits out a nicely-layed-out tile set for MSCC. But i wanted to do something a little more hands-on.
I could have opened up an image editor and started dragging rectangles around, but i've done that before and experience has taught me that cropping out a bunch of squares on pixel-perfect boundaries is a pain, so instead i fired up Tiled and imported my messy tile banks into it as a tileset. Yes, i used a map editor to make a tileset.
Well, first i had to get them out of FCEUX.
There was no image export button so i took a screenshot and cropped the two tile banks out manually.
Whatever.
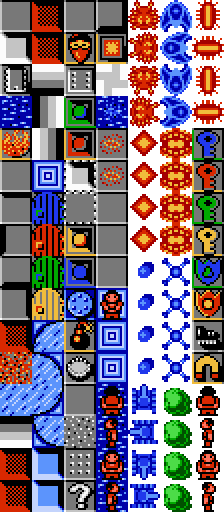
I also wrote a couple of super hacky scripts to a) fix the alignment problem in the second bank and 2) apply the palettes.
I wasn't sure which palette went which which tiles, so i did the simplest possible thing and just spit out 8 copies of each bank with each palette applied. That way i could have all the possible choices available in Tiled.
Anyway! Here's the final result. I had to improvise a few tiles that are MSCC-only. I'll probably throw together a zip and put that up on my Chip's Challenge page sometime soon.
P.S. Of course i found out afterwards that someone had already created a spritesheet for the NES version, so i probably could have used that and saved myself some work. 🤷
![[screenshot of pichu and pikachu in the alola dex]](../2020/alola_dex_screenshot.png)
![[boring wailord.jpg]](../2020/321.png)