Alpine Linux on the desktop: awesome feat or fool's errand?
Over the past month, I once again decided to explore an interesting Linux distribution: Alpine Linux. Much like my previous adventures with FreeBSD, this started out as sheer curiosity on what seemed a lightweight distribution suitable for my Raspberry Pi, but eventually impressed me enough to the point that I wanted to try it out on one of my machines for more "real work."
I couldn't be more in love with it, at least not in a software-realted manner.
Tiny footprint, fast in every sense, modularity and usability are just a few of the adjectives that I can list to talk about it. From a development/testing environment in a virtual machine or Docker image all the way to a full Desktop OS with all the end-user functionality included, Alpine Linux excelled and impressed me in in several levels. So much, in fact, that Alpine became the first Free Software project that I actively want to support and contribute to instead of only being a passive user of it, in a true community-driven fashion.
Thus, I set out to put it through the ultimate test: turn it into a daily-driver-level OS. Although I was confident it would be possible, there was only one thing that initially held me back: Alpine Linux self-proclaims that it's a distribution intended primarily for secure operations in embedded applications and servers, and all of its design confirms it. Busybox-based core utilities instead of standalone programs, load-from-RAM system that reduces disk usage, musl libc with a more restricted set of applications... all far from my use case in the spectrum. How hard would making it a desktop be?

This post describes my steps and procedures I followed when creating a minimal, but fully functional Desktop Machine with all my basic requirements, similar to those described in my FreeBSD essay. As much of it is pretty minimal and without much "help" provided, I wouldn't exactly recommend it to beginners, but you could try it out if you're looking for a challenge.
The target implementation
Borrowing from my previous experience in turning FreeBSD into a Desktop, here are my requirements for the final implementation of my Alpine Linux desktop:
- Have a Graphical Environment available, DE or not.
- Be able to manage power and sessions (login or out, screen locking, suspend etc)
- Be able to manage multiple types of connections, especially WiFi
- Manage and install my required software with ease of maintenance
There is lots of room to improve on these, but for a bare-minimum desktop, this ought to be enough.
Base Installation
I previously covered the installation of Alpine Linux in a Virtual Machine in a video I posted on my Peertube channel and it's a pretty straightforward process. The good news is that, as long as you intend to use Alpine as the only OS in your hard drive, pretty much the same steps for a VM apply.
First, burn the ISO to a USB stick, and boot it in the target machine. Although Alpine has quite a few choices of architectures, you can safely choose the x86 or x64 ISO and just go with it. They are all hybrid, and work with USB sticks.
When the system has booted, log in using the username root and no password. You're going to change the root password later throughout the installation process. The live system is pretty minimal, only the console and a few utilities, but the bread and butter is the installer script: setup-alpine. This script itself calls out to other setup-* scripts that configure specific aspects of the system, which you can see by typing setup- and hitting Tab.
To start the installation, run setup-alpine and answer the questions at the prompts. The questions are pretty much straightforward for a seasoned user, but there are two steps that require some attention here.
First, at some step of the script, the installer will list about 50 different Alpine mirrors, and ask you which one you want to use with apk, Alpine's package manager. You even the option of testing which ones are closer/faster for you.
From my experience, however, some servers on this list are outdated and offline, and the installer will fail silently if you choose them even though they seem like a faster option. Therefore, I recommend simply choosing 1 here, and going with the default Alpine CDN, which is your best bet for uptime. Most Alpine packages are not very big anyway, so you're probably going to be fine.
Second, when the installer asks you which "installation mode" you'd like to use, choose sys. Alpine can run from what's called "diskless" mode, where stuff is loaded into RAM upon boot, and everything runs within RAM until explicitly committed by the user back to the disk. This is similar to how other minimalist distros like Puppy linux work, and helps both speed up slow computers by cutting out the need to load data from the disk and reduce the wear in NAND flash storage used in embedded systems.
However, I find this unnecessarily complicated for a standard PC use case, where disk and memory are more robust. The "traditional" install mode, reading and writing normally to disk, is called "sysmode" and its option is sys. Choose the label of your disk (example: sda) when prompted about "where to save configs."
The installer at the end of everything will cue that is has completed, and at that point you may reboot. Congrats, Alpine is installed!
Further tweaking
Ok, installation was pretty easy, right? Upon reboot, though, the system looks pretty minimal, like a default Arch Linux install. Time to start some tweaking so we can meet the requirements above. For starters, I suggest doing two things:
First, log in as root and create a normal user for yourself. Unlike in Puppy, we're going to run everything unpriviledged, but add the possibility of administrative work via sudo:
adduser kzimmermann
adduser kzimmermann wheel
Adding yourself to wheel will allow you to use sudo after its installation and configuration. But don't log out of root just yet!
Second, enable software sources other than Alpine's main repository. By default, apk ships with only the main repository enabled, which is the software developed and maintained by the official developers. However, the number of packages there is pretty small, and sometimes even misses basic things like the mutt email client. By enabling the community-contributed and testing repositories of Alpine, however, you have access to a much larger number of packages, about the same as the other mainstream distributions.
To enable these third-party sources, edit the /etc/apk/repositories file and uncomment or add the following lines:
# note, if you chose a different mirror, the prefix will be different:
http://dl-cdn.alpinelinux.org/alpine/v3.13/community
http://dl-cdn.alpinelinux.org/alpine/edge/testing
Now reload the repository cache :
apk update
apk upgrade
And now you can install pretty much any package you need - including Xorg which is the target of this post's implementation.
This is also a good time to change the default font of the Linux console if it's too small for your high-resolution display. Alpine ships with considerably more fonts than, for example, Arch and FreeBSD, and you can look into /usr/share/consolefonts/ to find one that suits you. Once you decide on one, run setfont your_desired_font.psf.gz to set it one-time, or edit /etc/conf.d/consolefont and add this line:
consolefont="YourFontFile.psf.gz"
Then add this change permanently into your init sequence with the command rc-update add consolefont boot.
Going graphical
Once again, there's a convenient script that automates most of the required steps in installing Xorg: setup-xorg-base. Run it as root to install everything that is required for the graphical environment, so it's a little easier than in FreeBSD. Once installation is complete, log in as your own user and test the install with the command startx.
If the default X environment (twm) and terminals open, there are no problems with the setup, and you can exit this test environment. At this point, you may install your own window manager and start installing other software you wish. I chose my recent favorite Fluxbox, but whatever you choose, make sure to add its execution to your ~/.xinitrc, so that you can start it with startx from the console.
Power and session management
In order to better manage the desktop sessions (i.e. suspend and hibernate the machine), install the package elogind. This will enable you to suspend using the command sudo loginctl suspend, which I outlined in a post before. And as some beautiful people correctly pointed out, it's possible to do it sudo-less by combining it with polkitd. I have not tried to couple this with power manager tools to get a nice "close the lid to sleep" effect, but I presume it might be possible - i.e. some DEs like Xfce.
Since I don't use a display manager, I simply go with xscreensaver to lock my session. You may use what your DE provides as well.
Brightness control so far is still a little clunky for me. Like in FreeBSD, I resort to the command line to change the brightness, but unlike there, there's no intel_backlight package apparently. Instead, what you can do to control the brightness is change the value of this file as root:
echo $VALUE > /sys/class/backlight/intel_backlight/brightness
There's a maximum value possible to it described in its neighboring file max_brightness so the $VALUE must be between 0 and that (here, for example, it's 975). To speed up the command, I created the following script, that also standardizes the possible values to 0 to 100:
#!/bin/sh
#
# @backlight.sh
# This script must be run as the root user (su -c) in order to work
#
# Pass a number between 0 and 100 as $1 to set up brightness in your laptop
#

if [ $(echo $USER) != "root" ]
then
    echo "You must run this as root (su -c) to set the brightness."
    echo "sudo doesn't work. Dunno why. Don't insist, it's fruitless..."
    exit 1
fi

if [ -z "$1" ]
then
    echo "USAGE: $(basename $0) BRIGHTNESS"
    echo "Where BRIGHTNESS is a value between 0 and 100"
    echo "This script must be run as the root user "
    exit 1
fi

MAX="$(cat /sys/class/backlight/intel_backlight/max_brightness)"

TMP="$(echo "scale=2; ($1 / 100) * $MAX" | bc )"

NEW="$(echo $TMP | awk -F "." '{print $1}')"

echo $NEW > /sys/class/backlight/intel_backlight/brightness && \
    echo "Brightness set to $NEW"
This allows me to set the brightness (as root) as backlight.sh 25, for example. Yet, there are some other issues with this, like the fact that calling this with sudo doesn't work either - su -c or nothing, my friend.
I'm thinking that somewhere along the setting up of a DE, there might be a way around this, perhaps with some program running setuid to allow this call, or adding yourself to the video group could do the trick too?
Managing WiFi
As a laptop user, there may be times when I need to log into a different WiFi network, despite my use case being almost always desktop-like. I must be able to log into another unknown network should I bring my machine there.
Being able to easily change networks in a graphical way is nice to have, but not exactly a hard requirement in my book. The Alpine repository includes all tools for managing WiFi, including the more user-friendly NetworkManager with its applet for the system tray. You can get the full stack by running the following:
apk add networkmanager wpa-supplicant dhcpd
To have them all run at startup time for a true desktop-like session, add them to your OpenRC init:
rc-update add wpa-supplicant
rc-update add dhcpcd
rc-update add networkmanager
Initially, however, I went in mostly raw and decided that from my previous experiences in the command-line only, only using wpa_supplicant would be enough - and I wasn't wrong.
A little bit of an alphabet soup in the beginning, but the command is incredibly straightforward once you issue it a few times:
wpa_supplicant -B -Dwext -wlan0 -c /etc/wpa_supplicant/wpa_supplicant.conf && dhclient wlan0
Where you have your config file wpa_supplicant.conf already generated by wpa_passphrase. dhclient will run after if the authentication is successful, and then hopefully you'll get an IP that will be yours to use throughout your lease.
And with that, all my bare requirements for a Desktop distro have just been fulfilled!... but that's not to mean it's without problems.
Usability gotchas and compensation
First of all: this installation does not support full disk encryption. At no step during installation you are prompted for setting up some sort of encryption, and given the project's goals, it's clear that it's not the officially supported way.
As per the Alpine Wiki, however, it is possible to deviate a little from the install scripts to set up an encrypted volume on which to install the OS, concluding into a setup similar to other modern distros. I should try this as my next step.
The other big "gotcha" I had was that upon starting X, there were no fonts to be found in the system, and as a result no graphical application was able to show me any sort of text, except for xterm (everything else was shown as a square glyph).
You could fix this by just searching (apk search -v font) and installing any font package, but additional configuration is needed to distinguish between serif, sans and monospace typefaces. If you don't, then you might find that everything becomes one font only, and you might end up with for example a terminal emulator with a serif non-fixed width font (ewww). Thankfully, there was an easy alternative pointed out by people on the fediverse: just install the preconfigured ttf-dejavu font package. Log out and back in the graphical session and everything is taken care of.
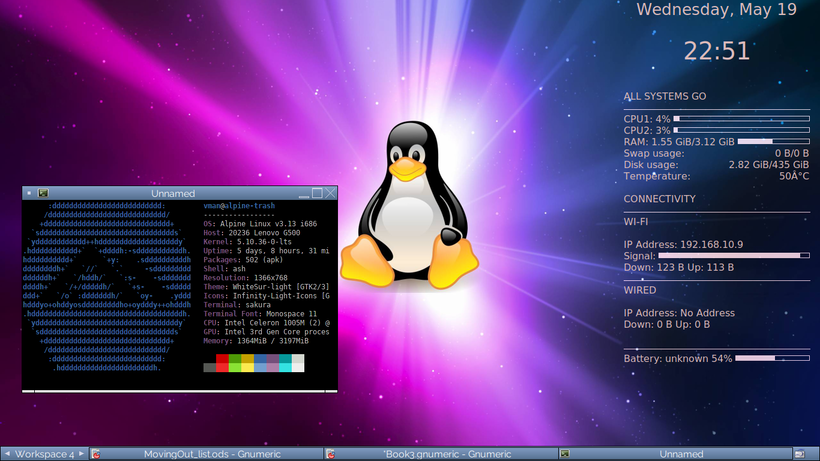
The final, but less worrying, gotcha is that unlike other distros, if you want to go graphical smoothly in Alpine you should install an icon set. Not for ricing reasons, just plain usability. The default icon set is very limited and does not cover icons for things like buttons and other graphical widgets that applications use, so if you use something like GNUmeric, you'll find that you can't distinguish which button is which.
You can go to GNOME Look and download a full icon set and easily fix this. I like the Infinity theme, but any full set should cover these gaps (that is, sets that can cover application widgets as well as desktop icons).
Conclusion
Alpine Linux is a great distribution that offers speed, flexibility and security by default. Although not primarily intended to a desktop audience, with a few tweaks it can be made fully functional Desktop (or laptop) OS with the base requirements working as good as other mainstream distributions.
Although I wouldn't exactly recommend it to an absolute beginner, Alpine is a great distro for minimalists who would like to try something that is a little more challenging and command-line oriented. I've been trying to daily driving it for the last weeks and still discovering new things about it (all pretty nice so far), with no major warts or showstoppers yet.
If you are curious to try it out, here's my suggestion: run it in a virtual machine! The download image is just over 100MB in size, about the same as a Puppy Linux ISO, and you can run it confortably with about 300MB RAM to spare, even with X.
And if you like it, get an older machine to try it out hands on. I found that Alpine did what previous distros didn't, and made fully usable a 4GB RAM computer as a desktop, including heavy usage of Firefox with video and dozens of tabs, and other graphical programs. Software bloat be damned, Alpine is the real deal here.
Have you ever tried Alpine on a Desktop? How was your experience? Let me know on Mastodon!
(I would also highly recommend that you check the Alpine Wiki entry on setting up a laptop if you venture into this adventure, as they have a very detailed writeup.)
This post is number #16 of my #100DaysToOffload project. Follow my progress through Mastodon!
Last updated on 05/21/21